31.08.2014, 20:47
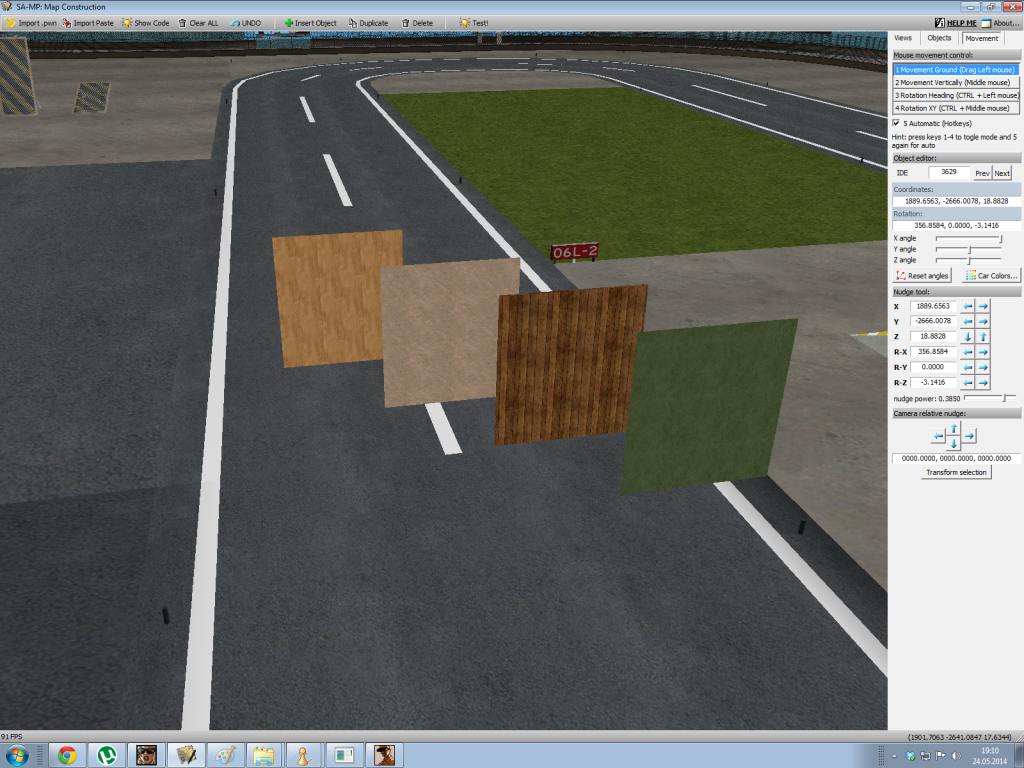
Texturing tutorial
This tutorial is for people who are familiar with pawno and mapping and who want to learn how to re-texture objects. However, the tutorial is written in human's language to make it easier to understand.
All you need is a test server which can be downloaded on sa-mp forums and the mapping constructor.Click here for the link
1.-Re-texturing single objects
2.-Extract the code to pawno.

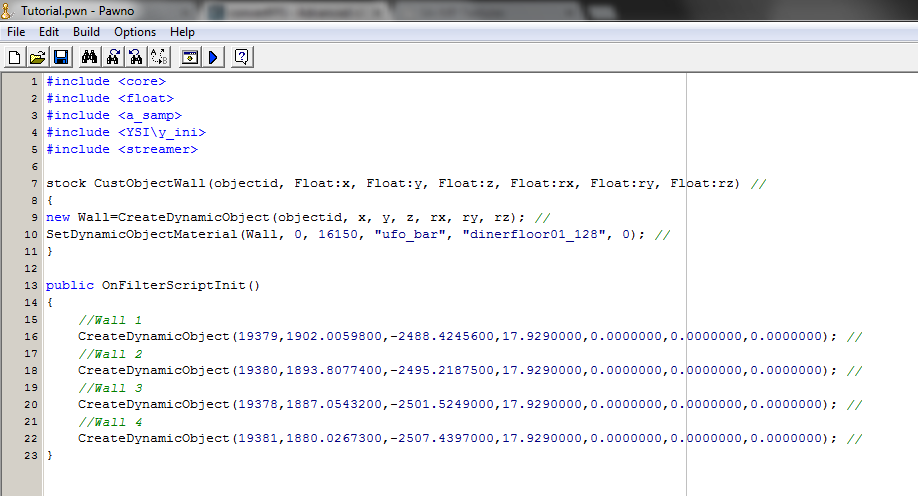
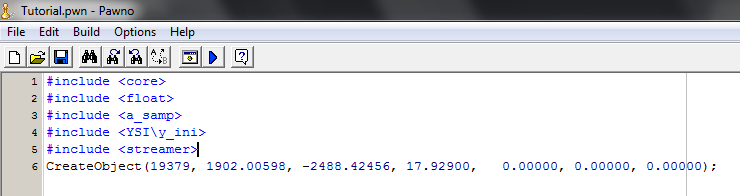
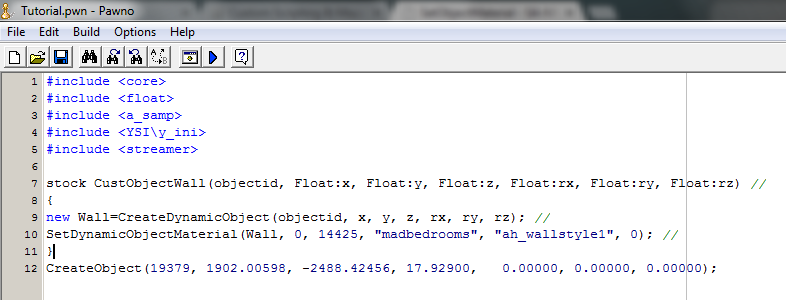
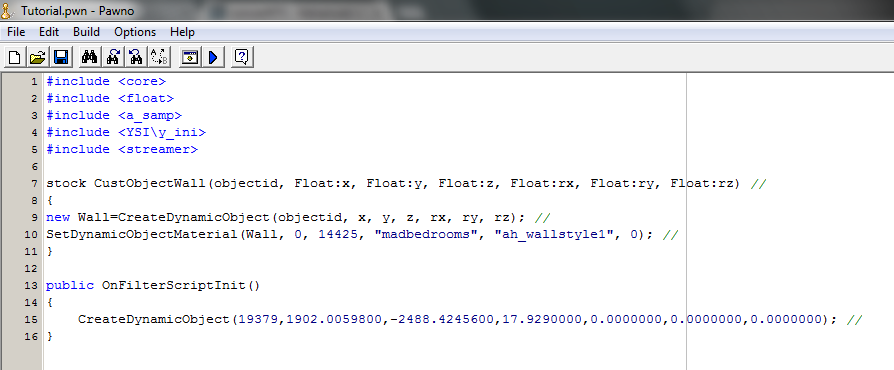
3.-Then add the includes, without them you won't be able to compile the code.
4.-After adding the includes you should write the stock lines. This already includes a texture, we'll rewrite it later on.
Code:
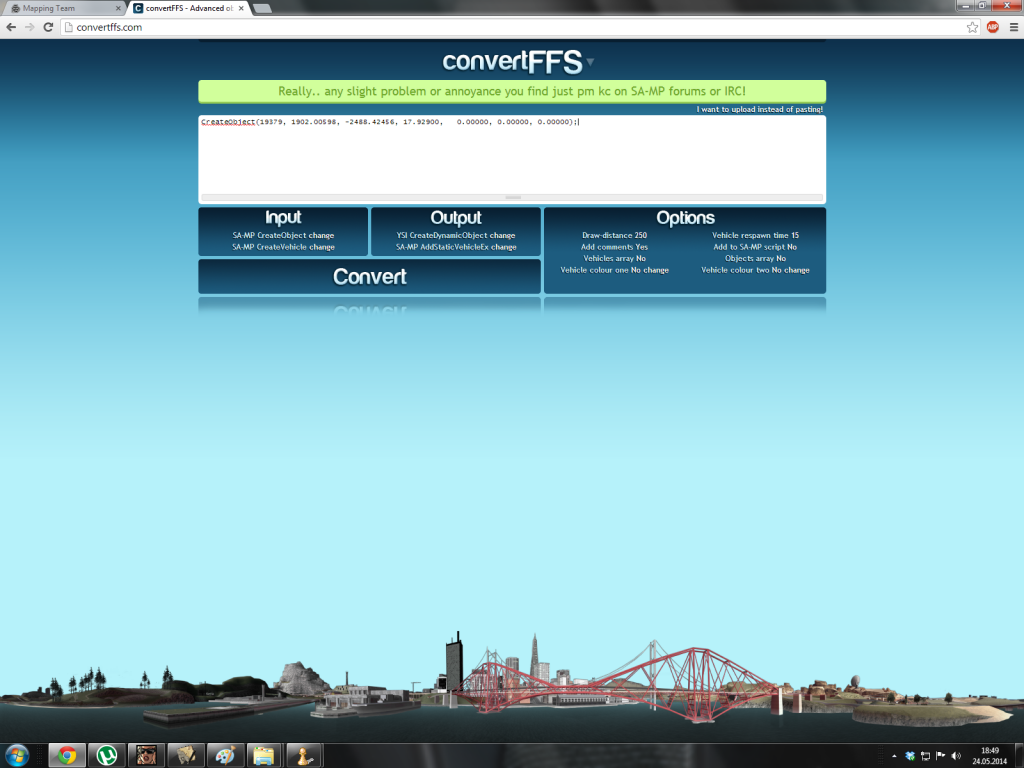
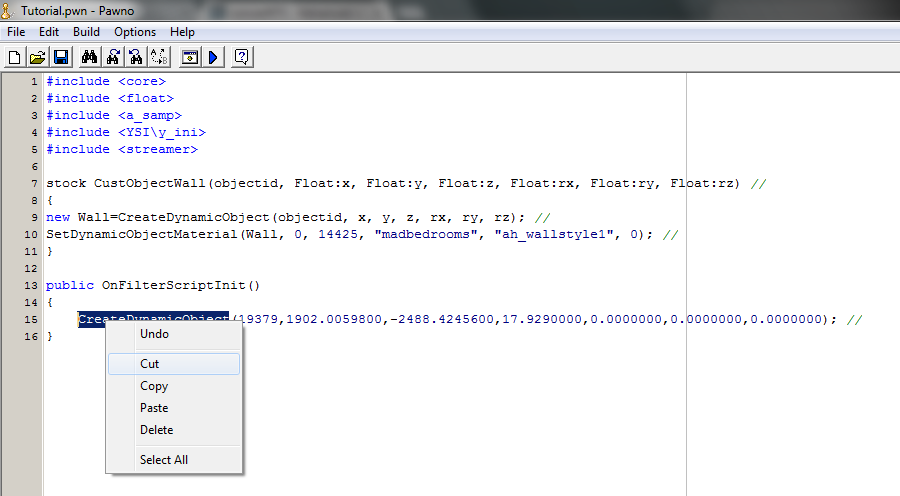
5.-Select this line and convert it to CreateDynamicObject's format by YSI on www.convertffs.com

The settings on the converter must be the same as below
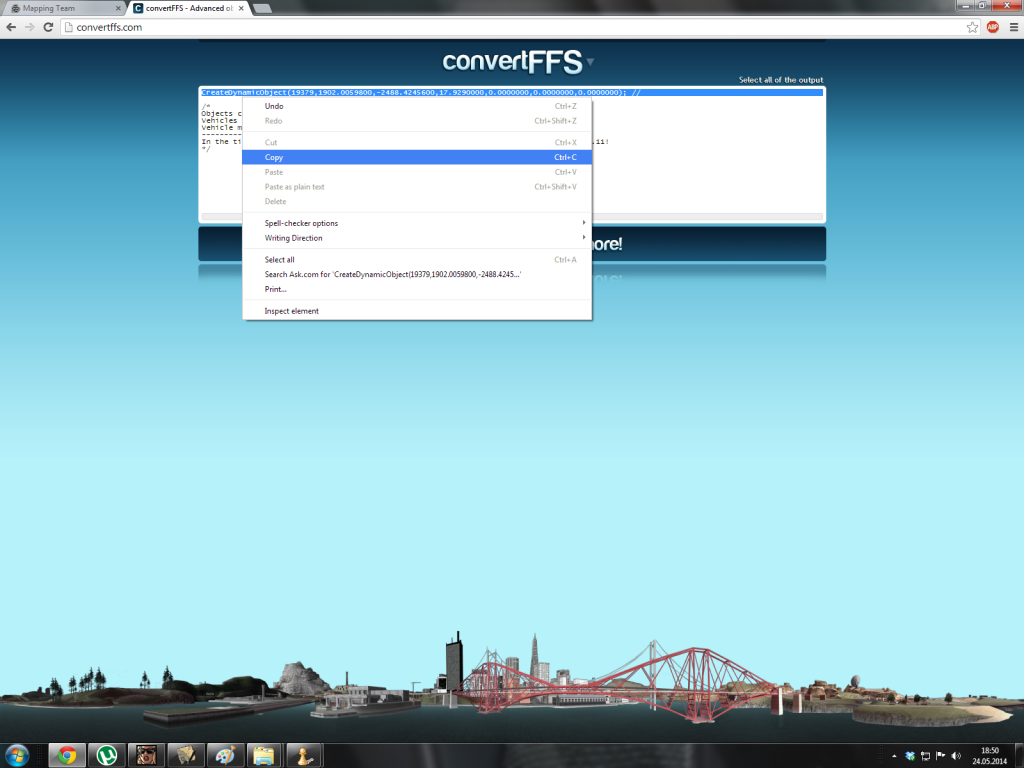
-Replace the old line with this one
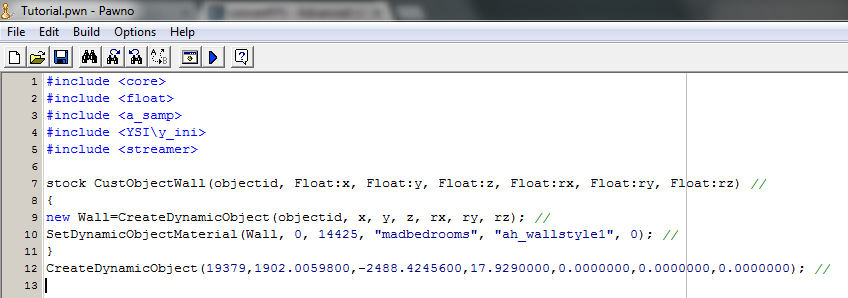
6.-Now after you've converted the object to YSI (CreateDynamicObject), you must place this line under 'public OnFilterScriptInit() or OnGameModeInit - depends how do you use the objects, starting and ending with these brackets {}.
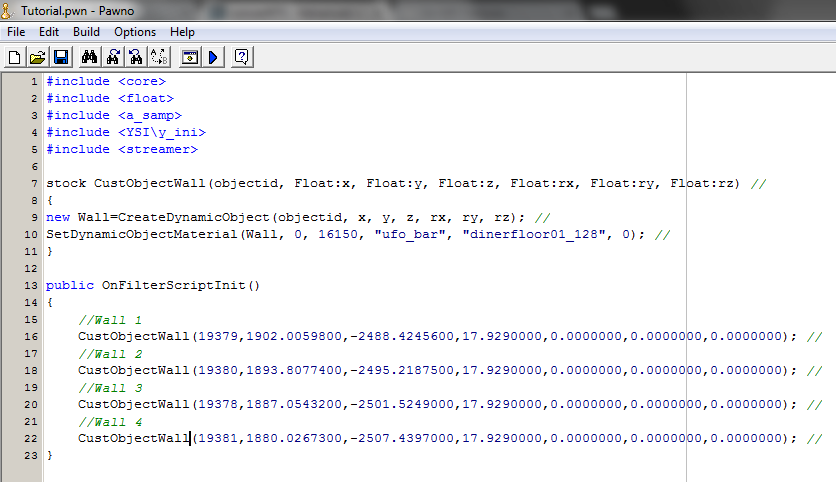
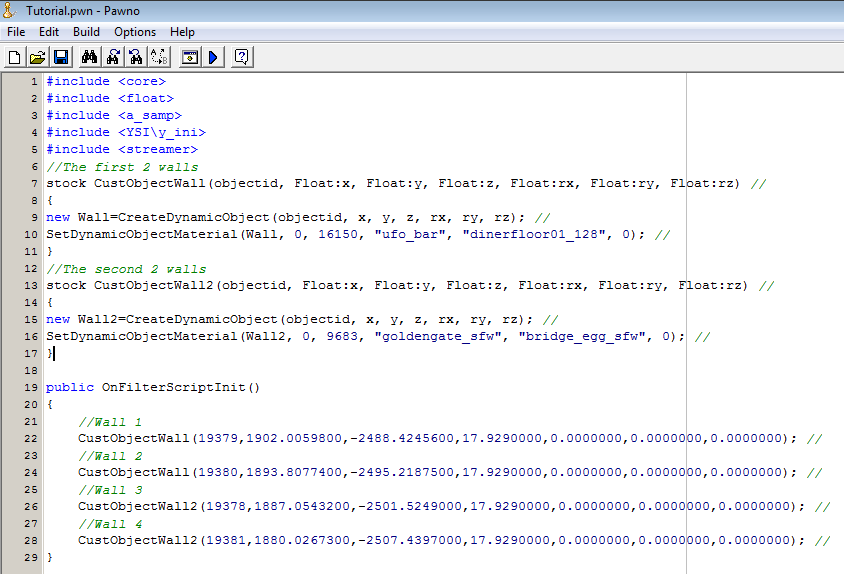
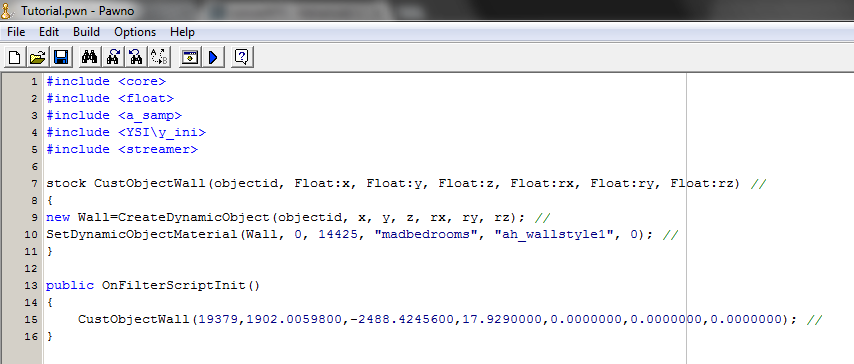
7.-Change 'CreateDynamicObject' to your stock, so the object can take the texture from it. In this case it'll be renamed to 'CustObjectWall', like in the stock.
It should look like this:
8.-Now, select your textures from http://textures.future-elife.com/ This is the easiest way to look for textures.
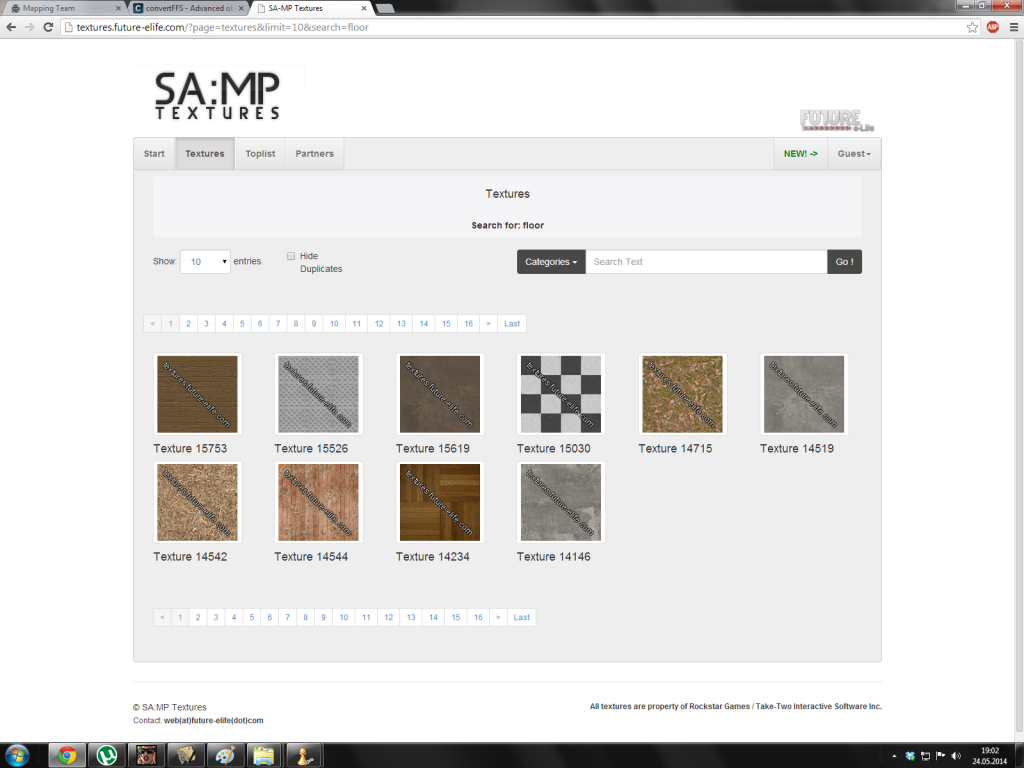
9.-Double click on the texture you want. It should bring up a small window with a code in it.
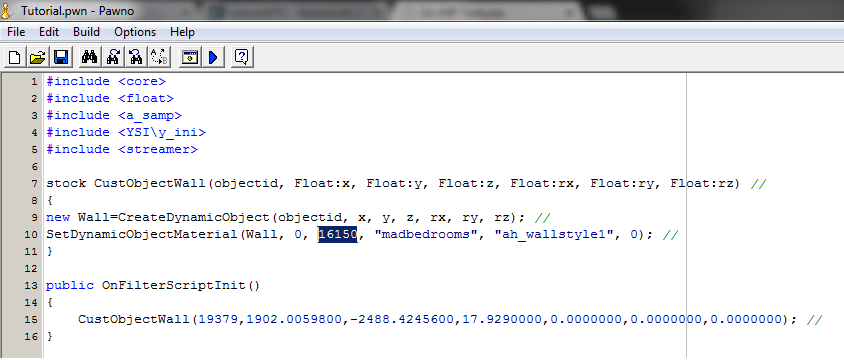
This is the objects ID you take the texture from.
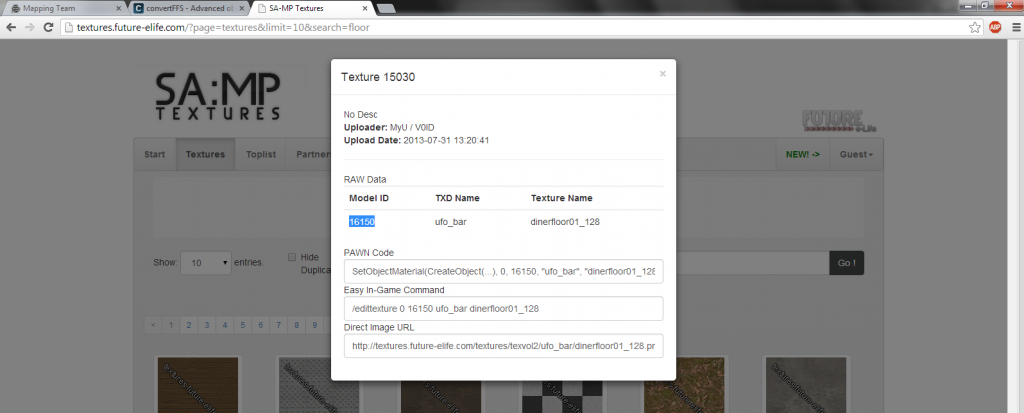
...the id ^^ goes here (below)
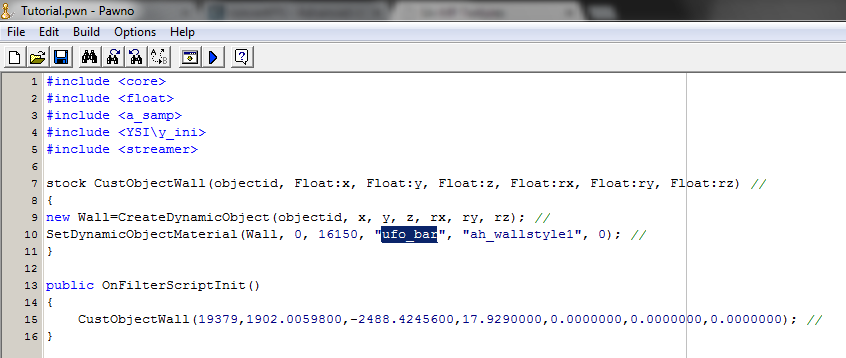
Now, the second 'line' is something like a package from which the texture is taken, many objects might have the same 'package' of textures.
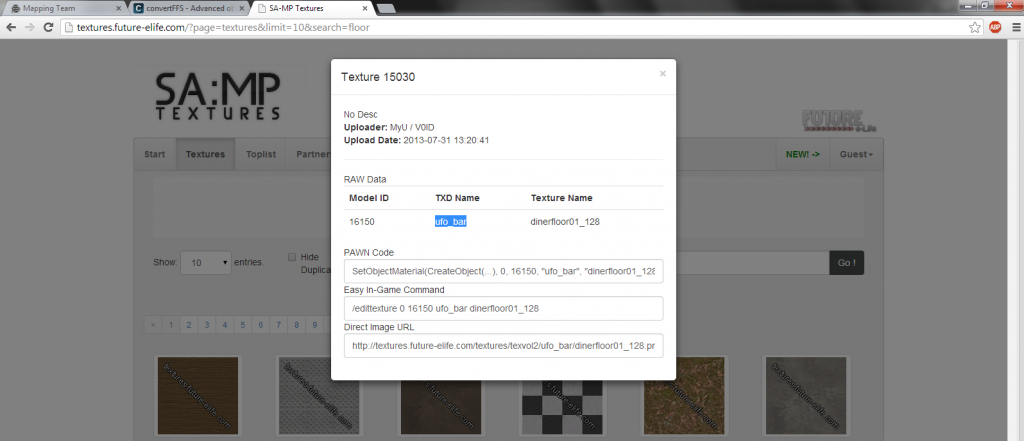
...and this goes right after the ID, between the "" marks. Like shown below.
The last 'line' is the exact texture from the 'package', in a single 'package' there could me many textures.
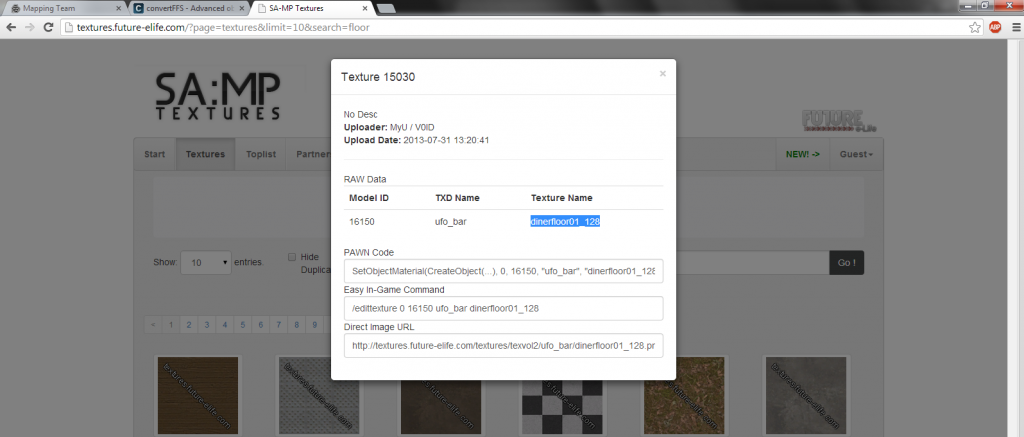
...and it goes here, also between the "" marks.
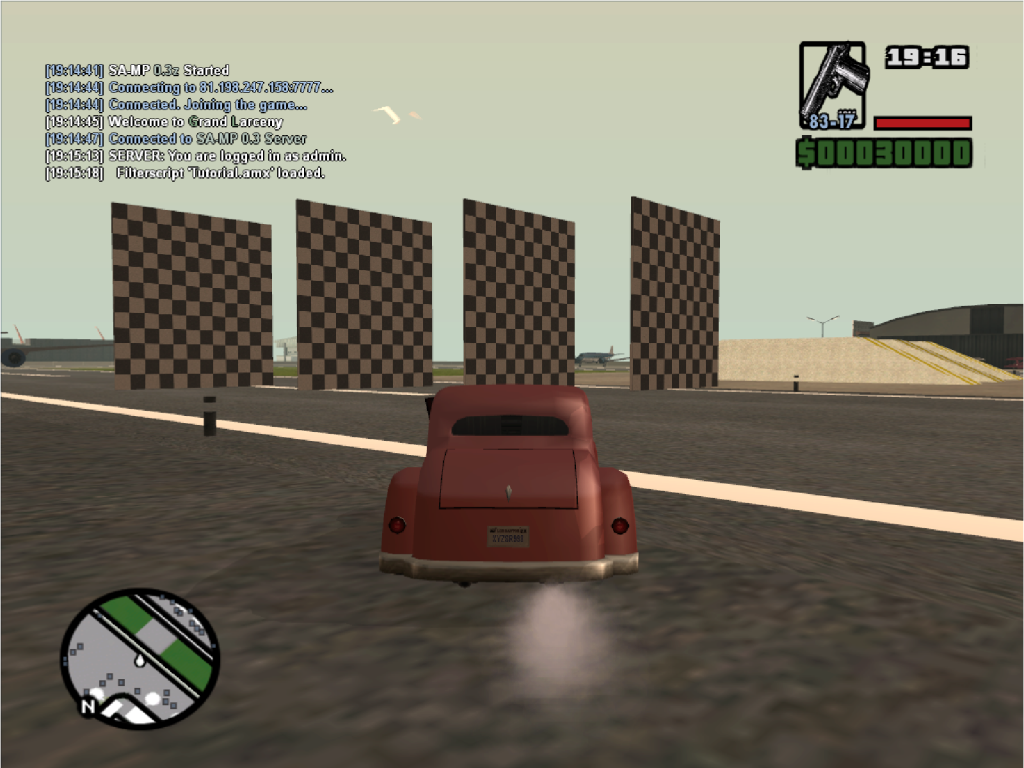
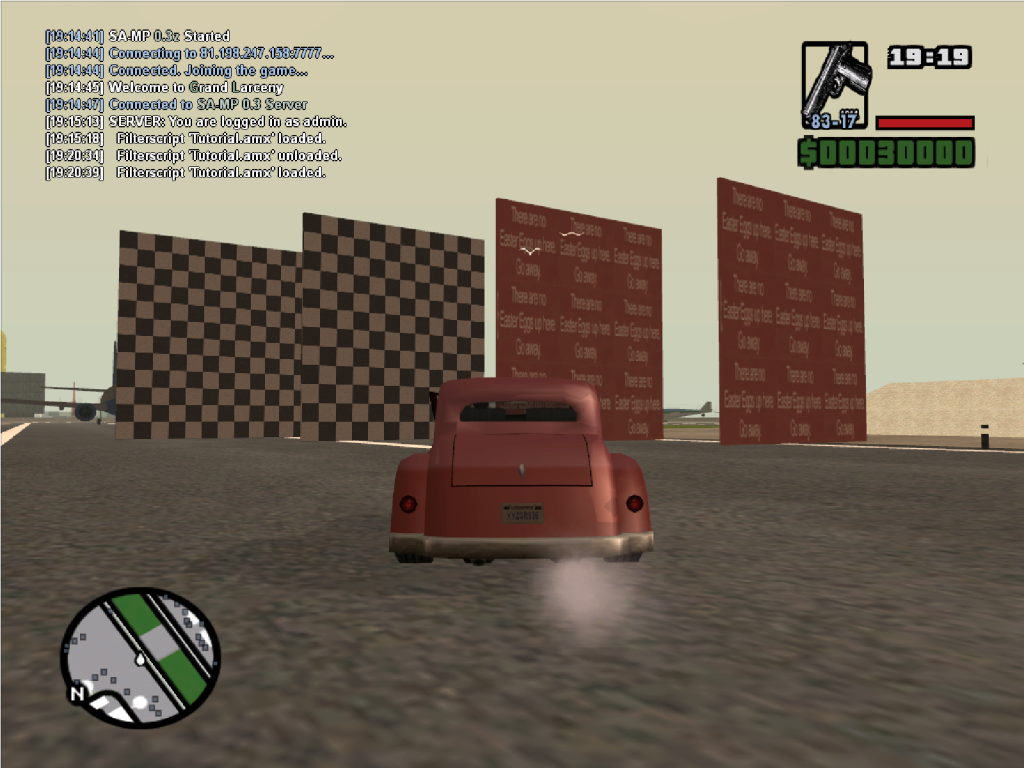
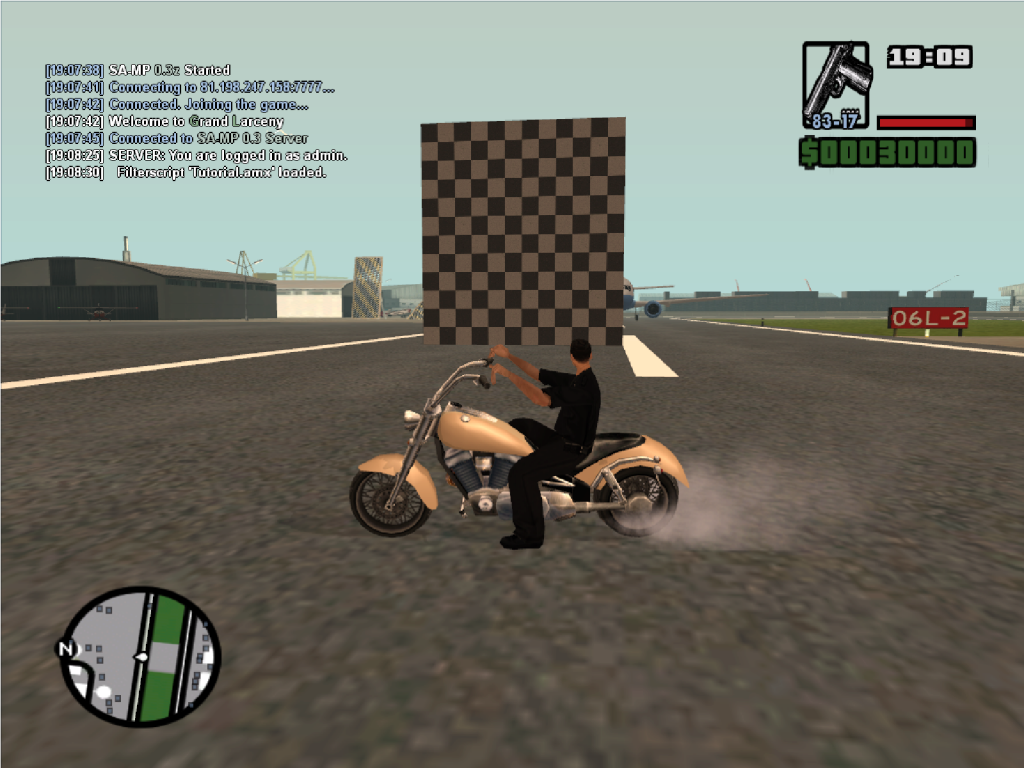
10.-After you have written everything correctly compile the code and load it in your test server to check the result.
This tutorial is for people who are familiar with pawno and mapping and who want to learn how to re-texture objects. However, the tutorial is written in human's language to make it easier to understand.
All you need is a test server which can be downloaded on sa-mp forums and the mapping constructor.Click here for the link
1.-Re-texturing single objects
2.-Extract the code to pawno.
3.-Then add the includes, without them you won't be able to compile the code.
pawn Код:
#include <core>
#include <float>
#include <a_samp>
#include <YSI\y_ini>
#include <streamer>
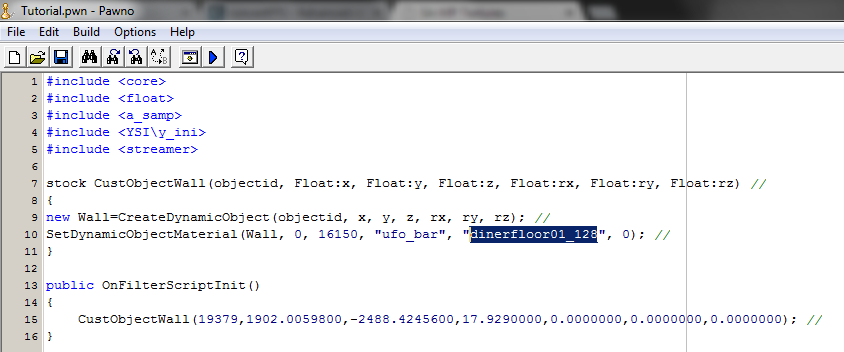
4.-After adding the includes you should write the stock lines. This already includes a texture, we'll rewrite it later on.
Code:
pawn Код:
stock CustObjectWall(objectid, Float:x, Float:y, Float:z, Float:rx, Float:ry, Float:rz) //
{
new Wall=CreateDynamicObject(objectid, x, y, z, rx, ry, rz); //
SetDynamicObjectMaterial(Wall, 0, 16150, "ufo_bar", "dinerfloor01_128", 0); //
}
5.-Select this line and convert it to CreateDynamicObject's format by YSI on www.convertffs.com
The settings on the converter must be the same as below
-Replace the old line with this one
6.-Now after you've converted the object to YSI (CreateDynamicObject), you must place this line under 'public OnFilterScriptInit() or OnGameModeInit - depends how do you use the objects, starting and ending with these brackets {}.
7.-Change 'CreateDynamicObject' to your stock, so the object can take the texture from it. In this case it'll be renamed to 'CustObjectWall', like in the stock.
It should look like this:
8.-Now, select your textures from http://textures.future-elife.com/ This is the easiest way to look for textures.
9.-Double click on the texture you want. It should bring up a small window with a code in it.
This is the objects ID you take the texture from.
...the id ^^ goes here (below)
Now, the second 'line' is something like a package from which the texture is taken, many objects might have the same 'package' of textures.
...and this goes right after the ID, between the "" marks. Like shown below.
The last 'line' is the exact texture from the 'package', in a single 'package' there could me many textures.
...and it goes here, also between the "" marks.
10.-After you have written everything correctly compile the code and load it in your test server to check the result.